

Waasaa iyatee?
Saat-Kaa coming from my place to yours.
How are you?
Saat-Kaa my Tlingit name (translation - A named Great Man).
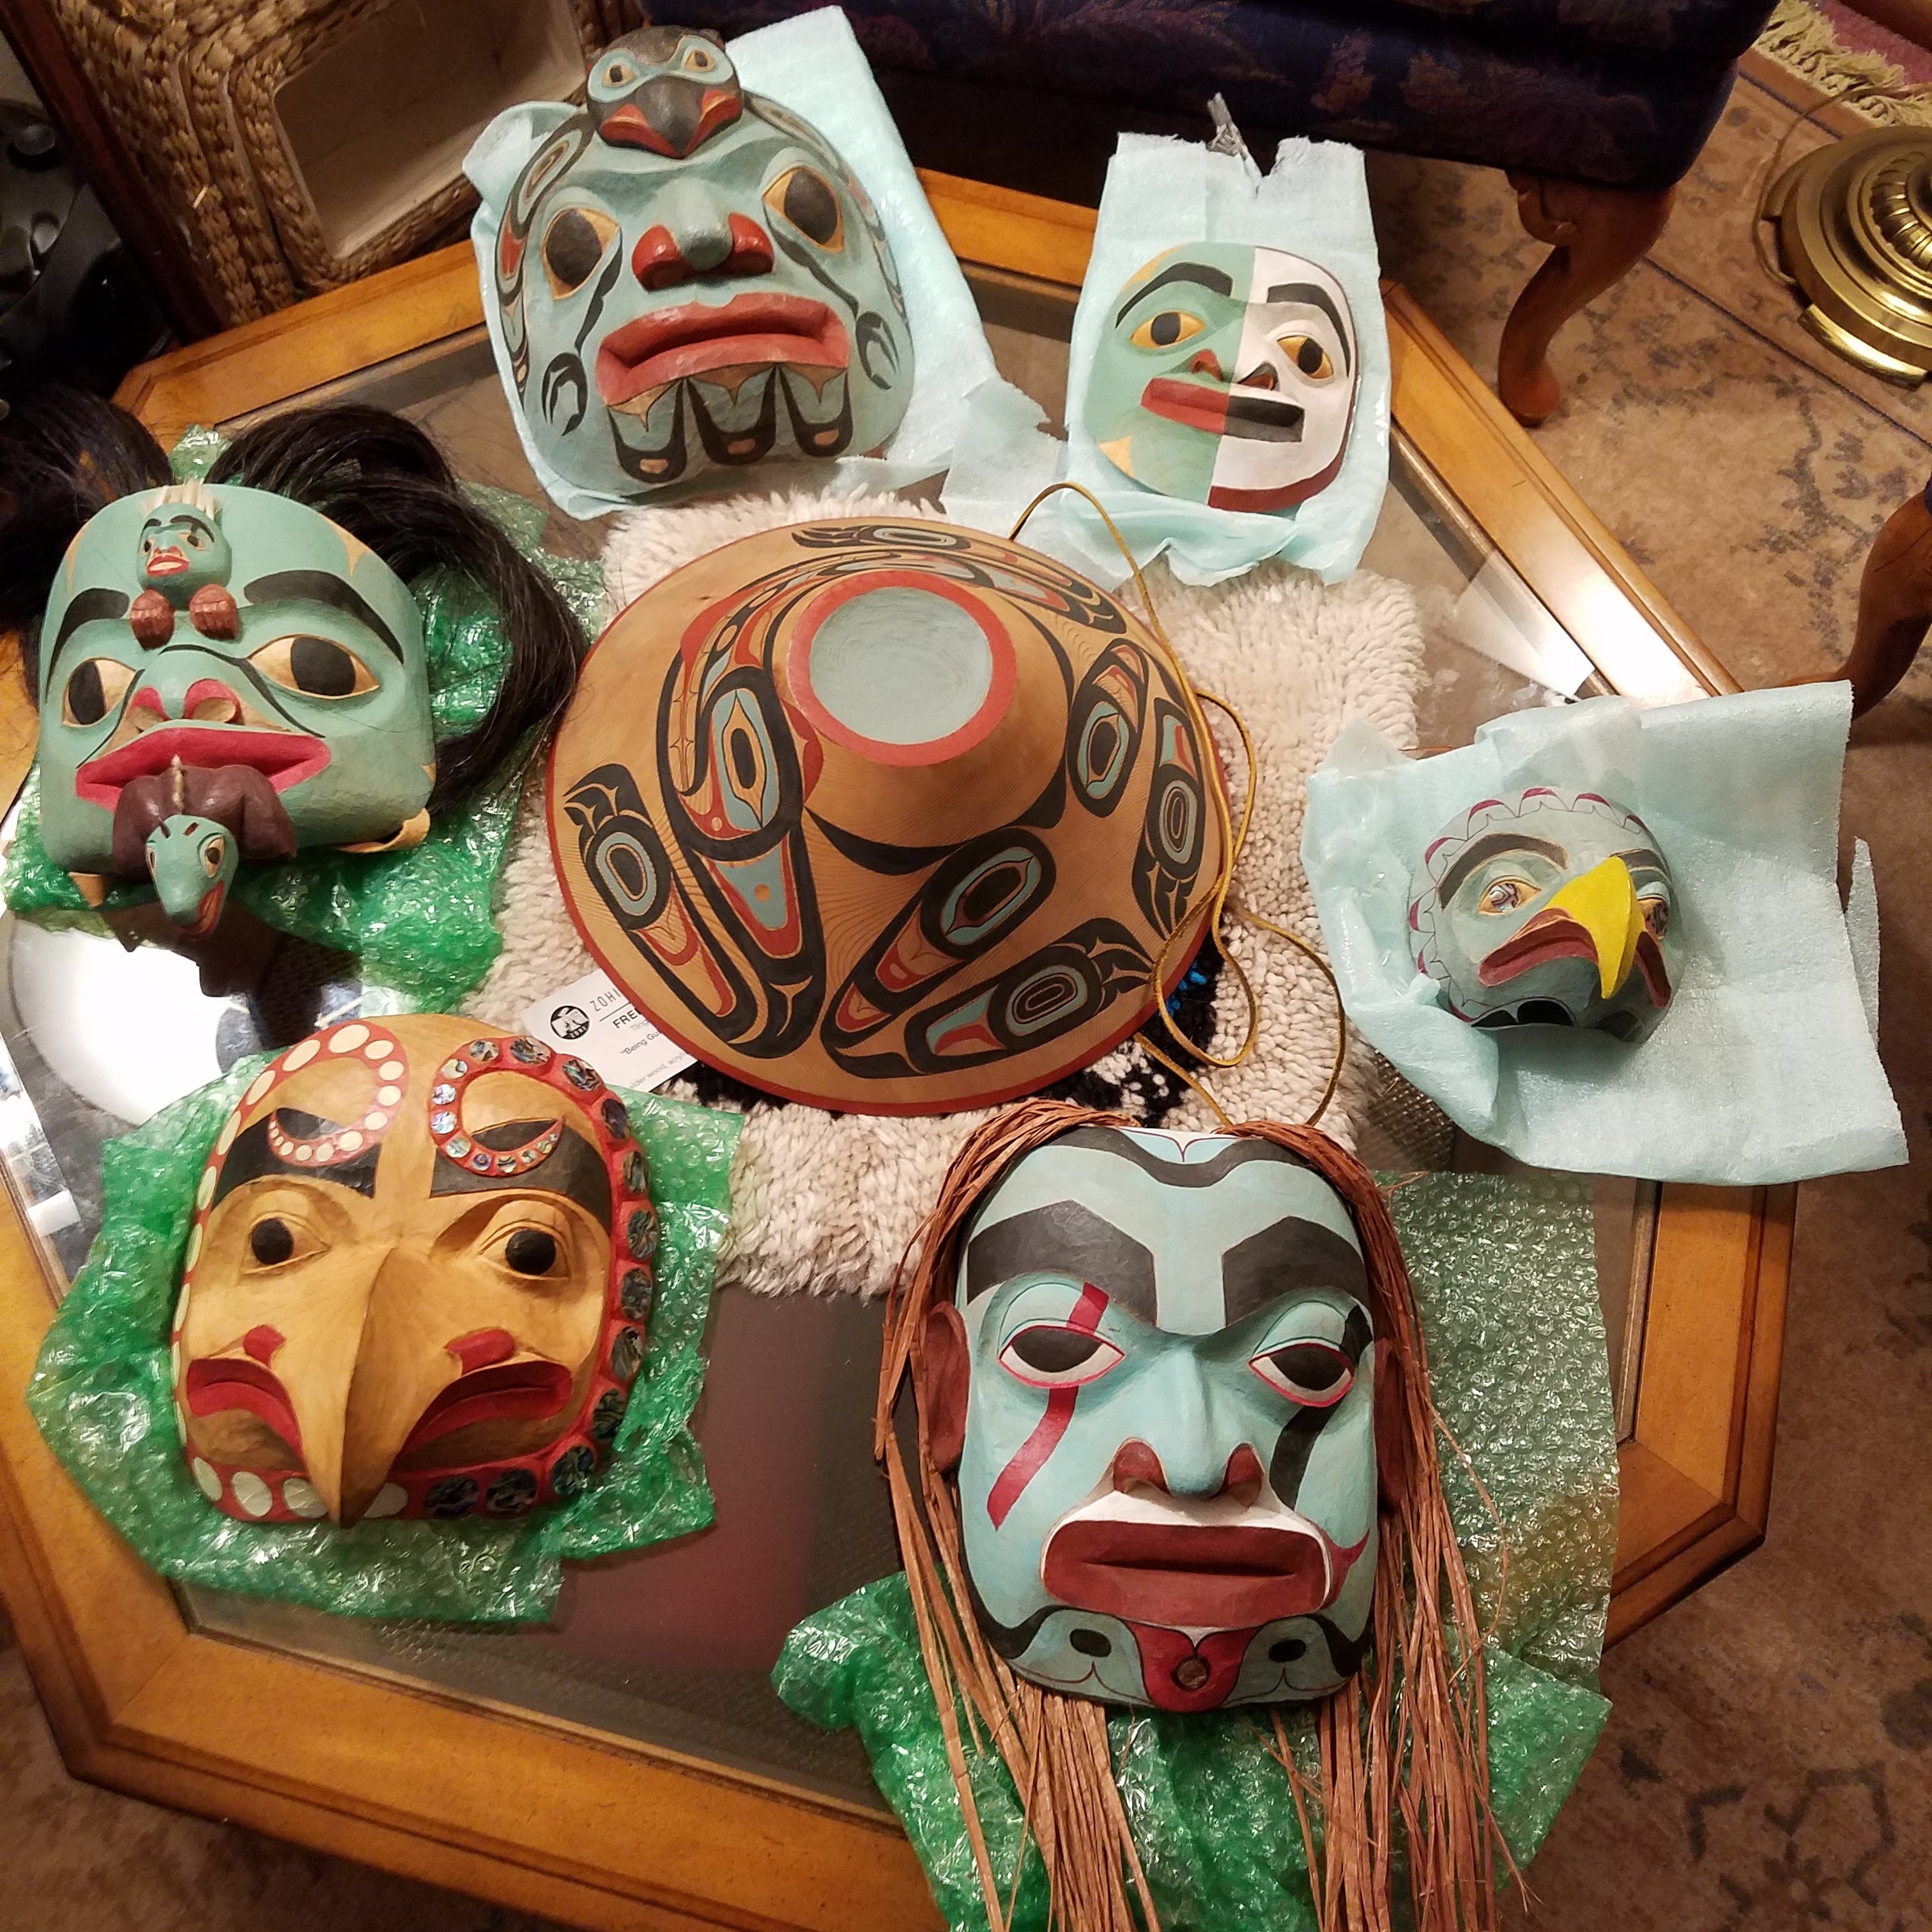
I want to share a story of how I ended up carving an Eagle mask. 6 years ago, we were living in Juneau. I wanted to get a piece of alder wood to carve a mask. I called my friend Ray Watkins up and asked if he knew where I could get some alder. He just cut a tree down and was making mask blanks for several different types of masks. Ray invited me over to carve one. He was roughing out some pieces on his bandsaw. I took him up on the offer. Not only was I getting a piece of alder, but I was also going to learn Ray’s approach to carving.
Ray and I talked about how artists have different ways of carving. Of course, there’s the beginning and the finished piece, with different ways of getting there from point A to point B. I’ve held the opinion that my way of carving is not the only way! It’s a way. Learning from other carvers is always good, you may learn one new idea and that makes it worth it. I remember talking to Loren White and asking him about his experience of learning how to carve. He told me that he took as many workshops as possible that were offered by the top carvers. I like to keep an open mind when opportunities to carve with other carvers present themselves, I make time when my schedule allows.
I am from the Eagle Moiety – Eagle / Brown Bear on my mother's side.
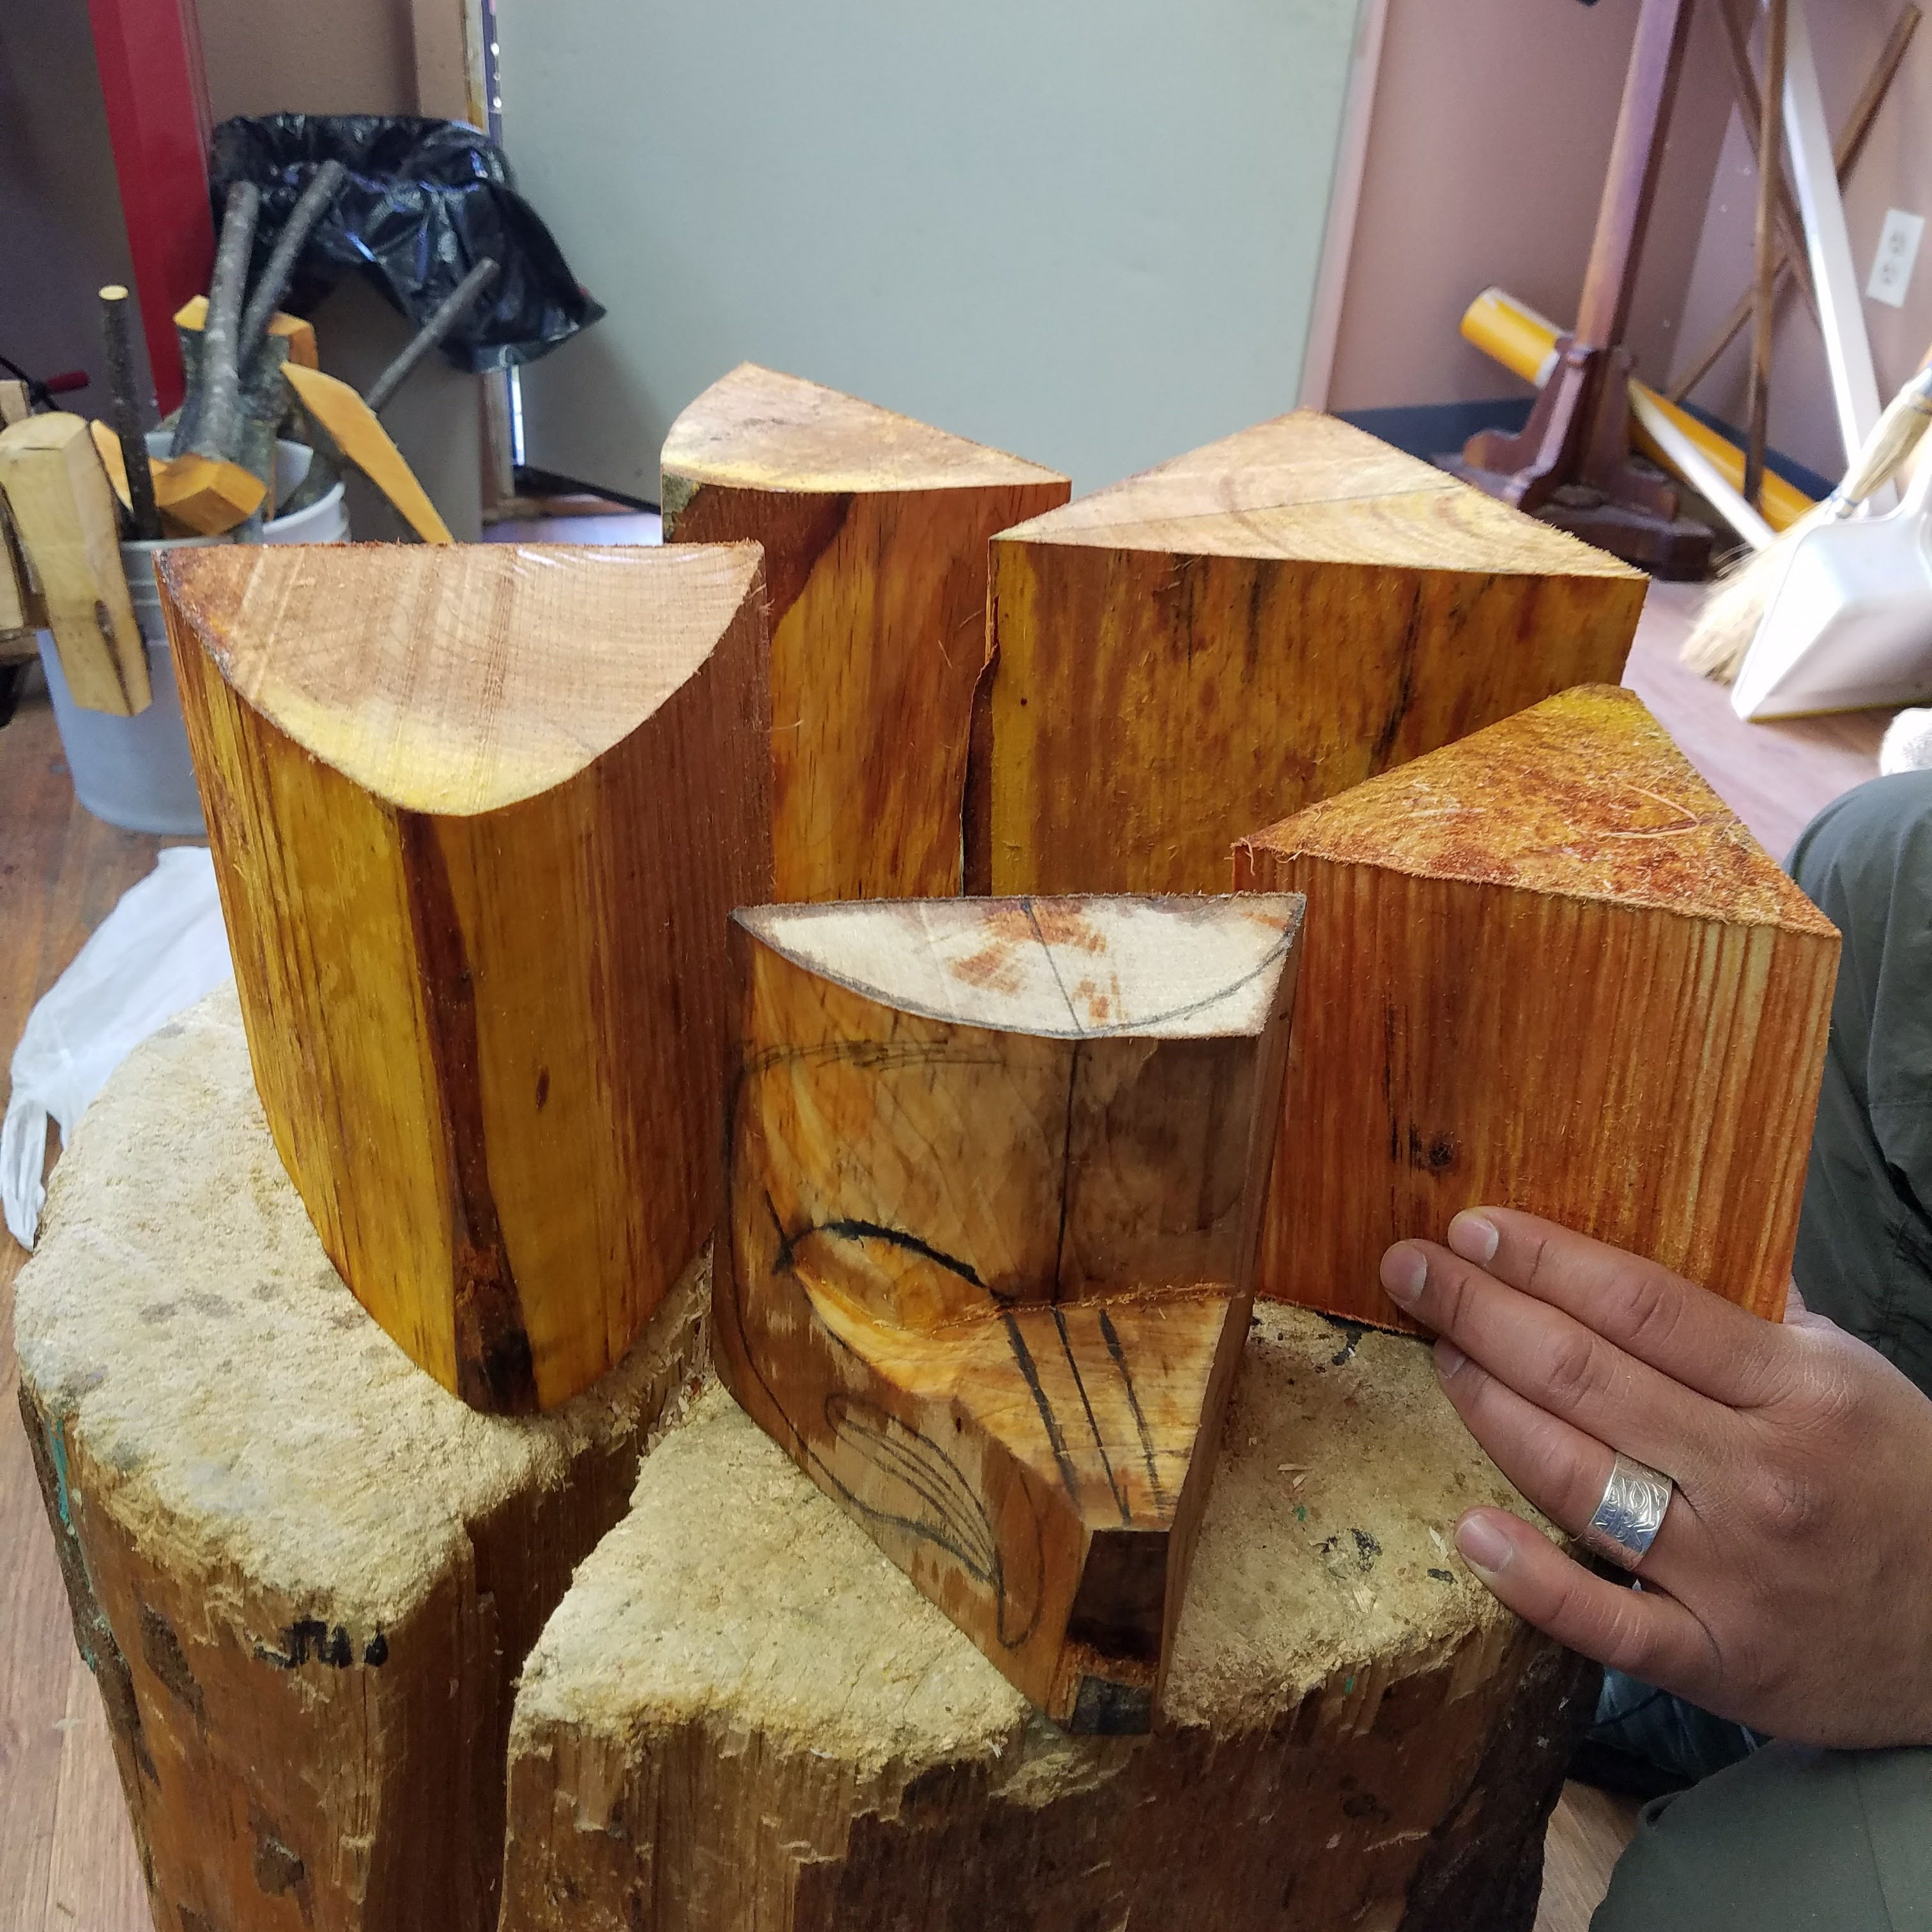
Ray had templates that were sized up to blocks of alder. I chose the Eagle one. He had a block that was rectangular at the base and tapered up to a triangle at the C/L, we transferred the design on both sides of the center line creating a profile. Since the beak is the furthest away from the back of the mask. We drew a line from the top of the beak to the forehead area and made a relief cut with a saw and a chisel to remove that section of wood.
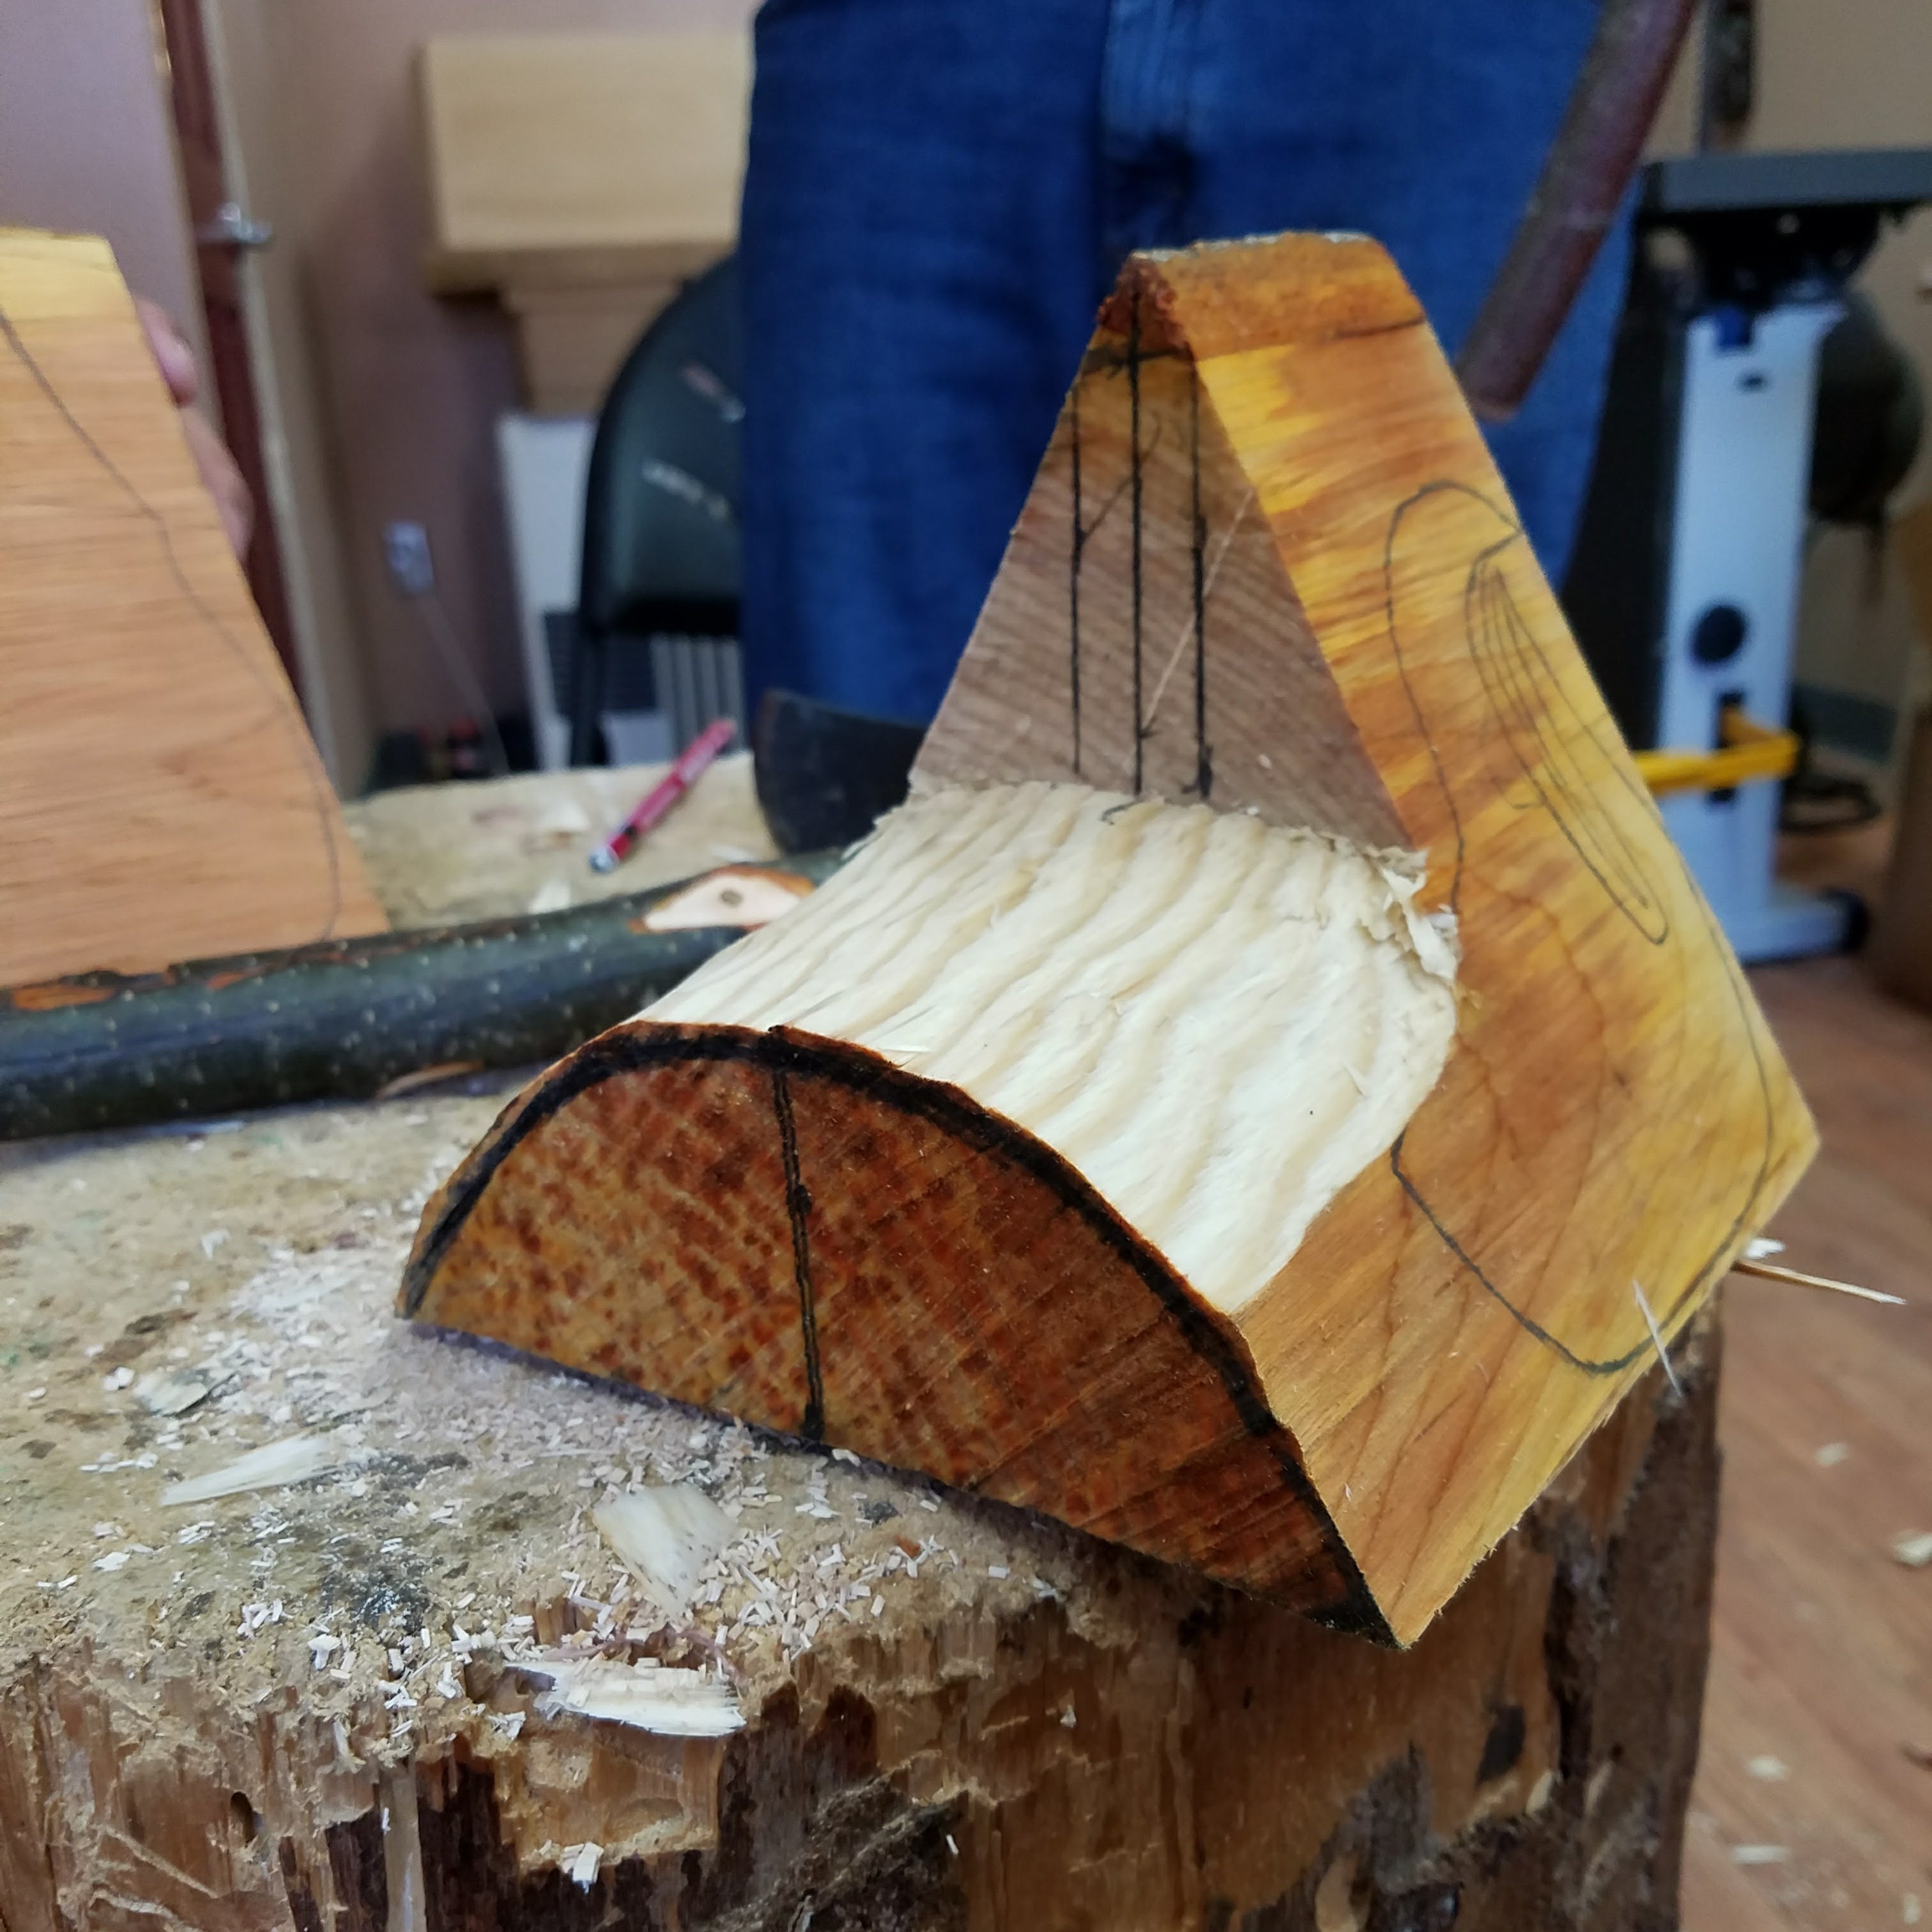
Now to round the forehead a bit. This is the roughing-out process. Really the beginning of shaping the mask. The thing about carving, as the wood is removed, the pencil lines need to be drawn back on. This process of going from a block to the shape of an Eagle or any other design is a similar one. As the wood is removed, lines also move as they are drawn onto the wood as the shape evolves.
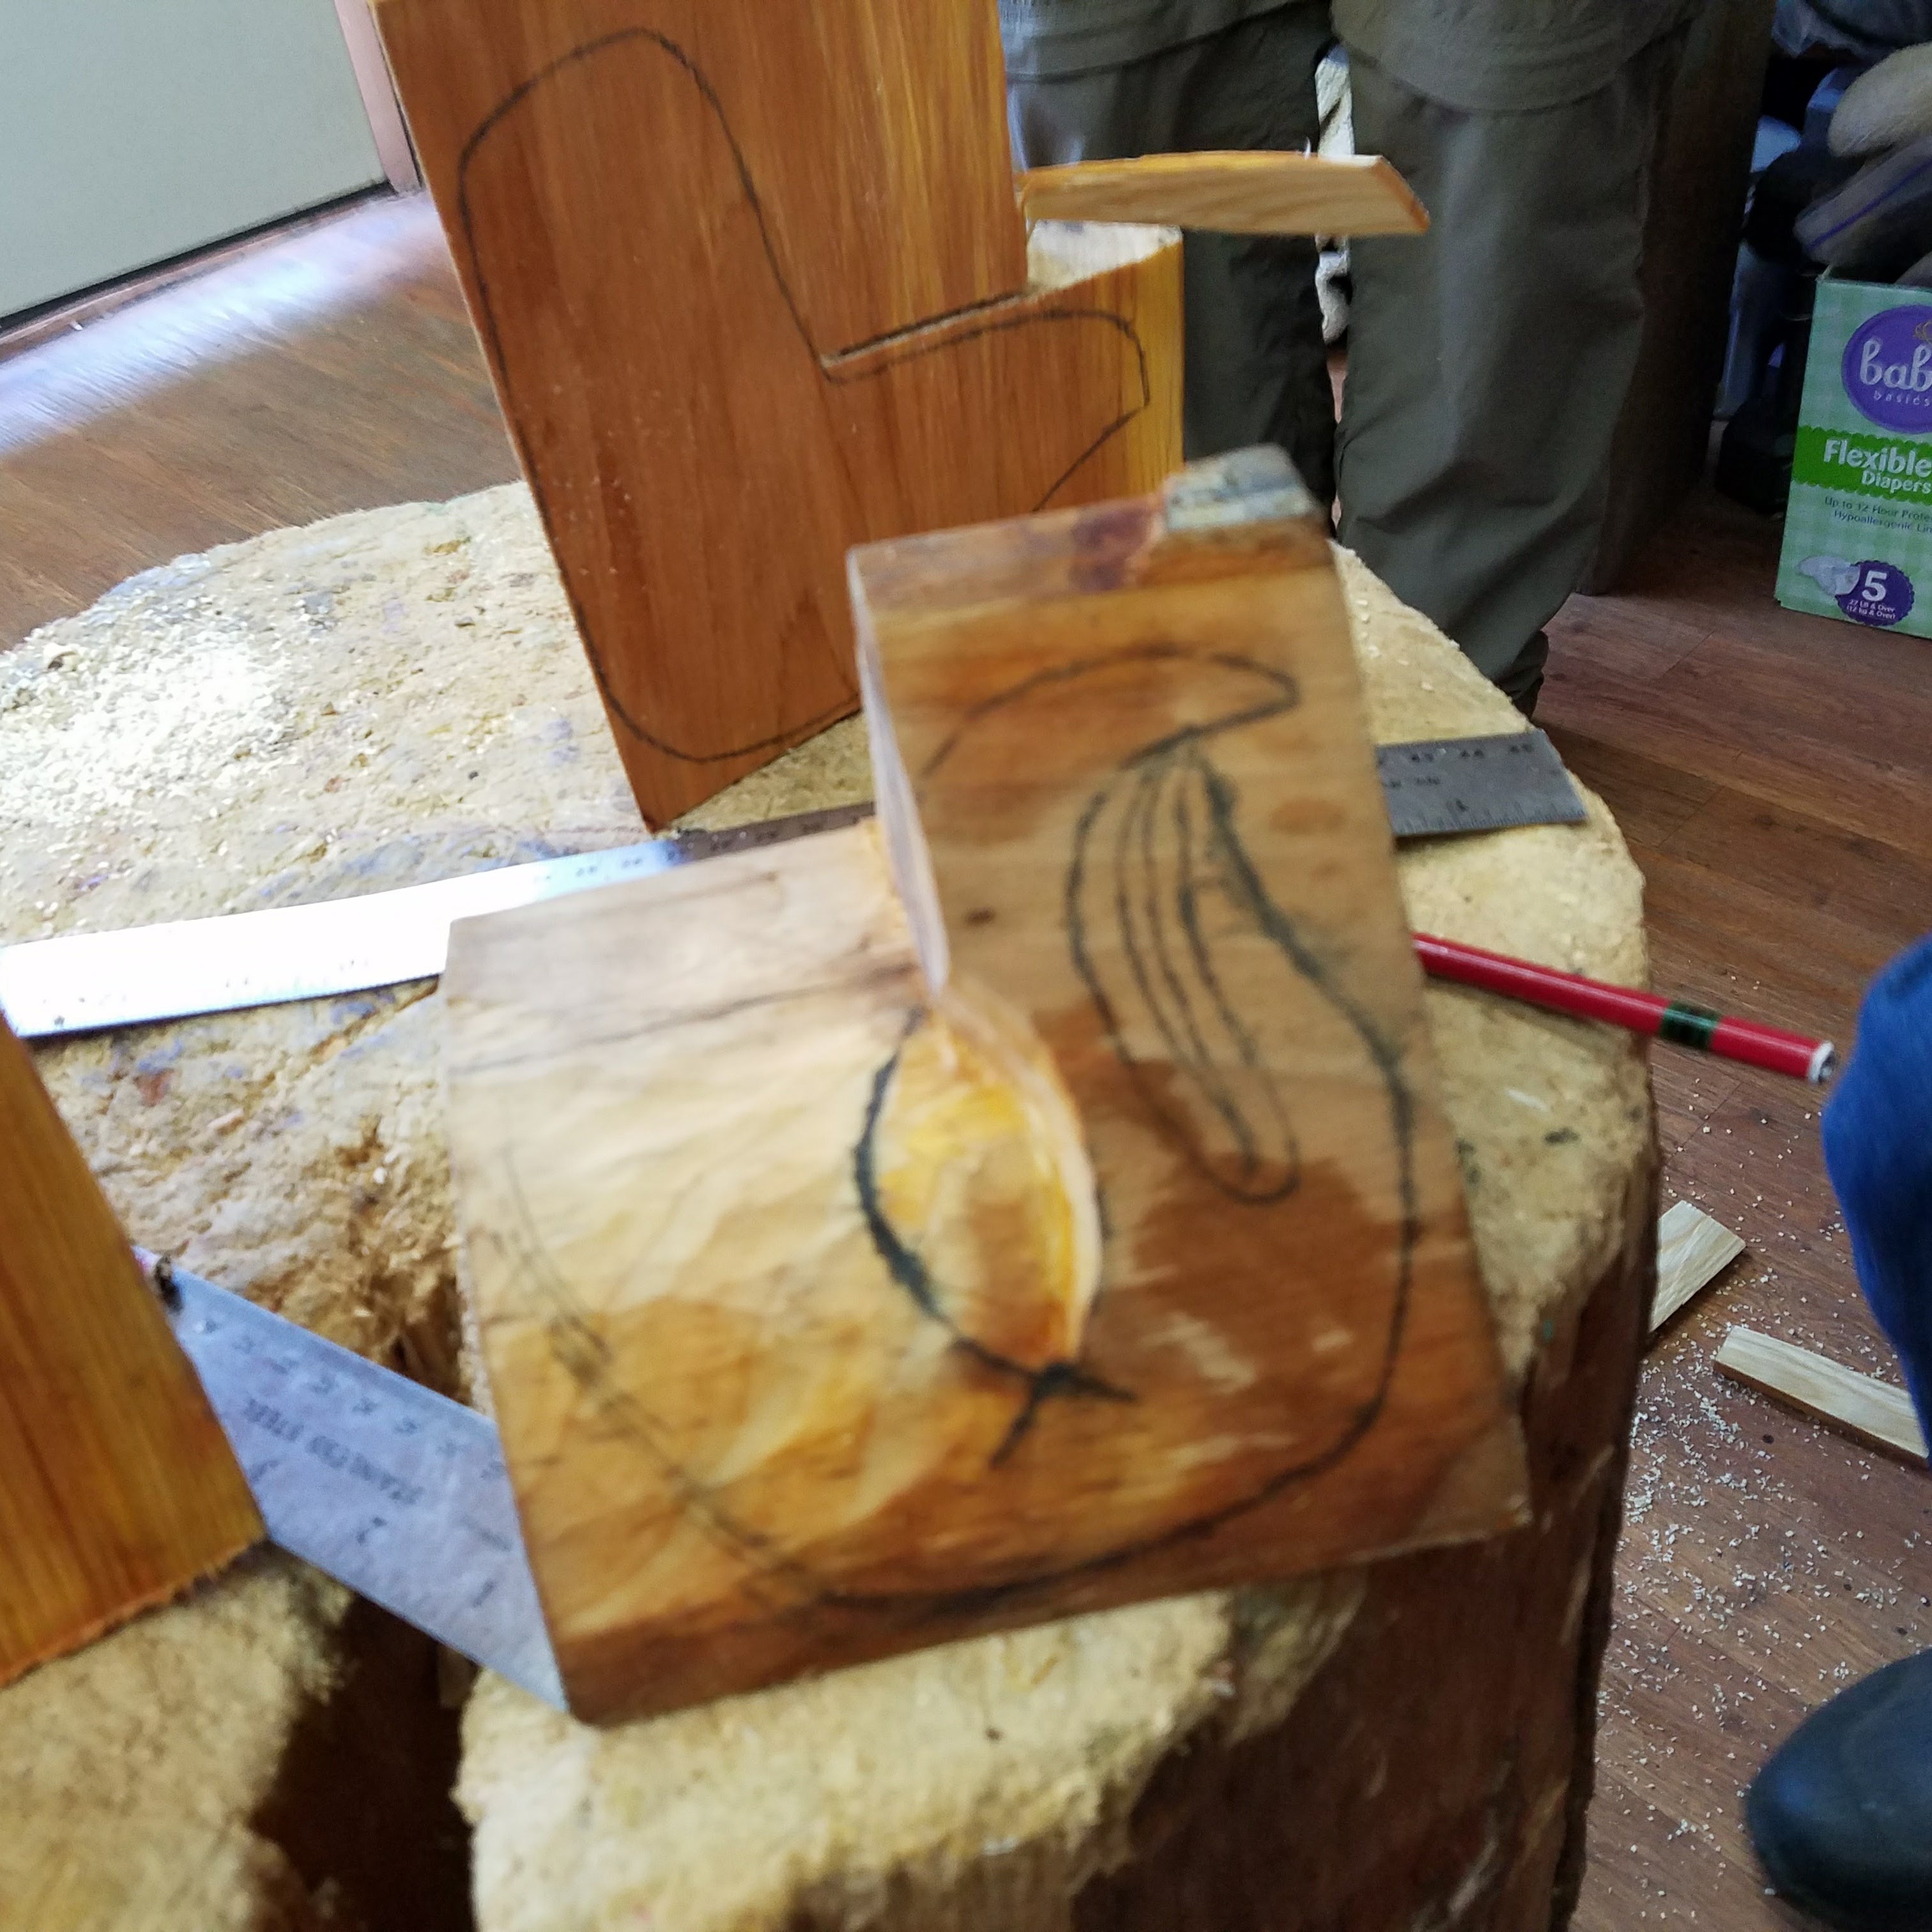
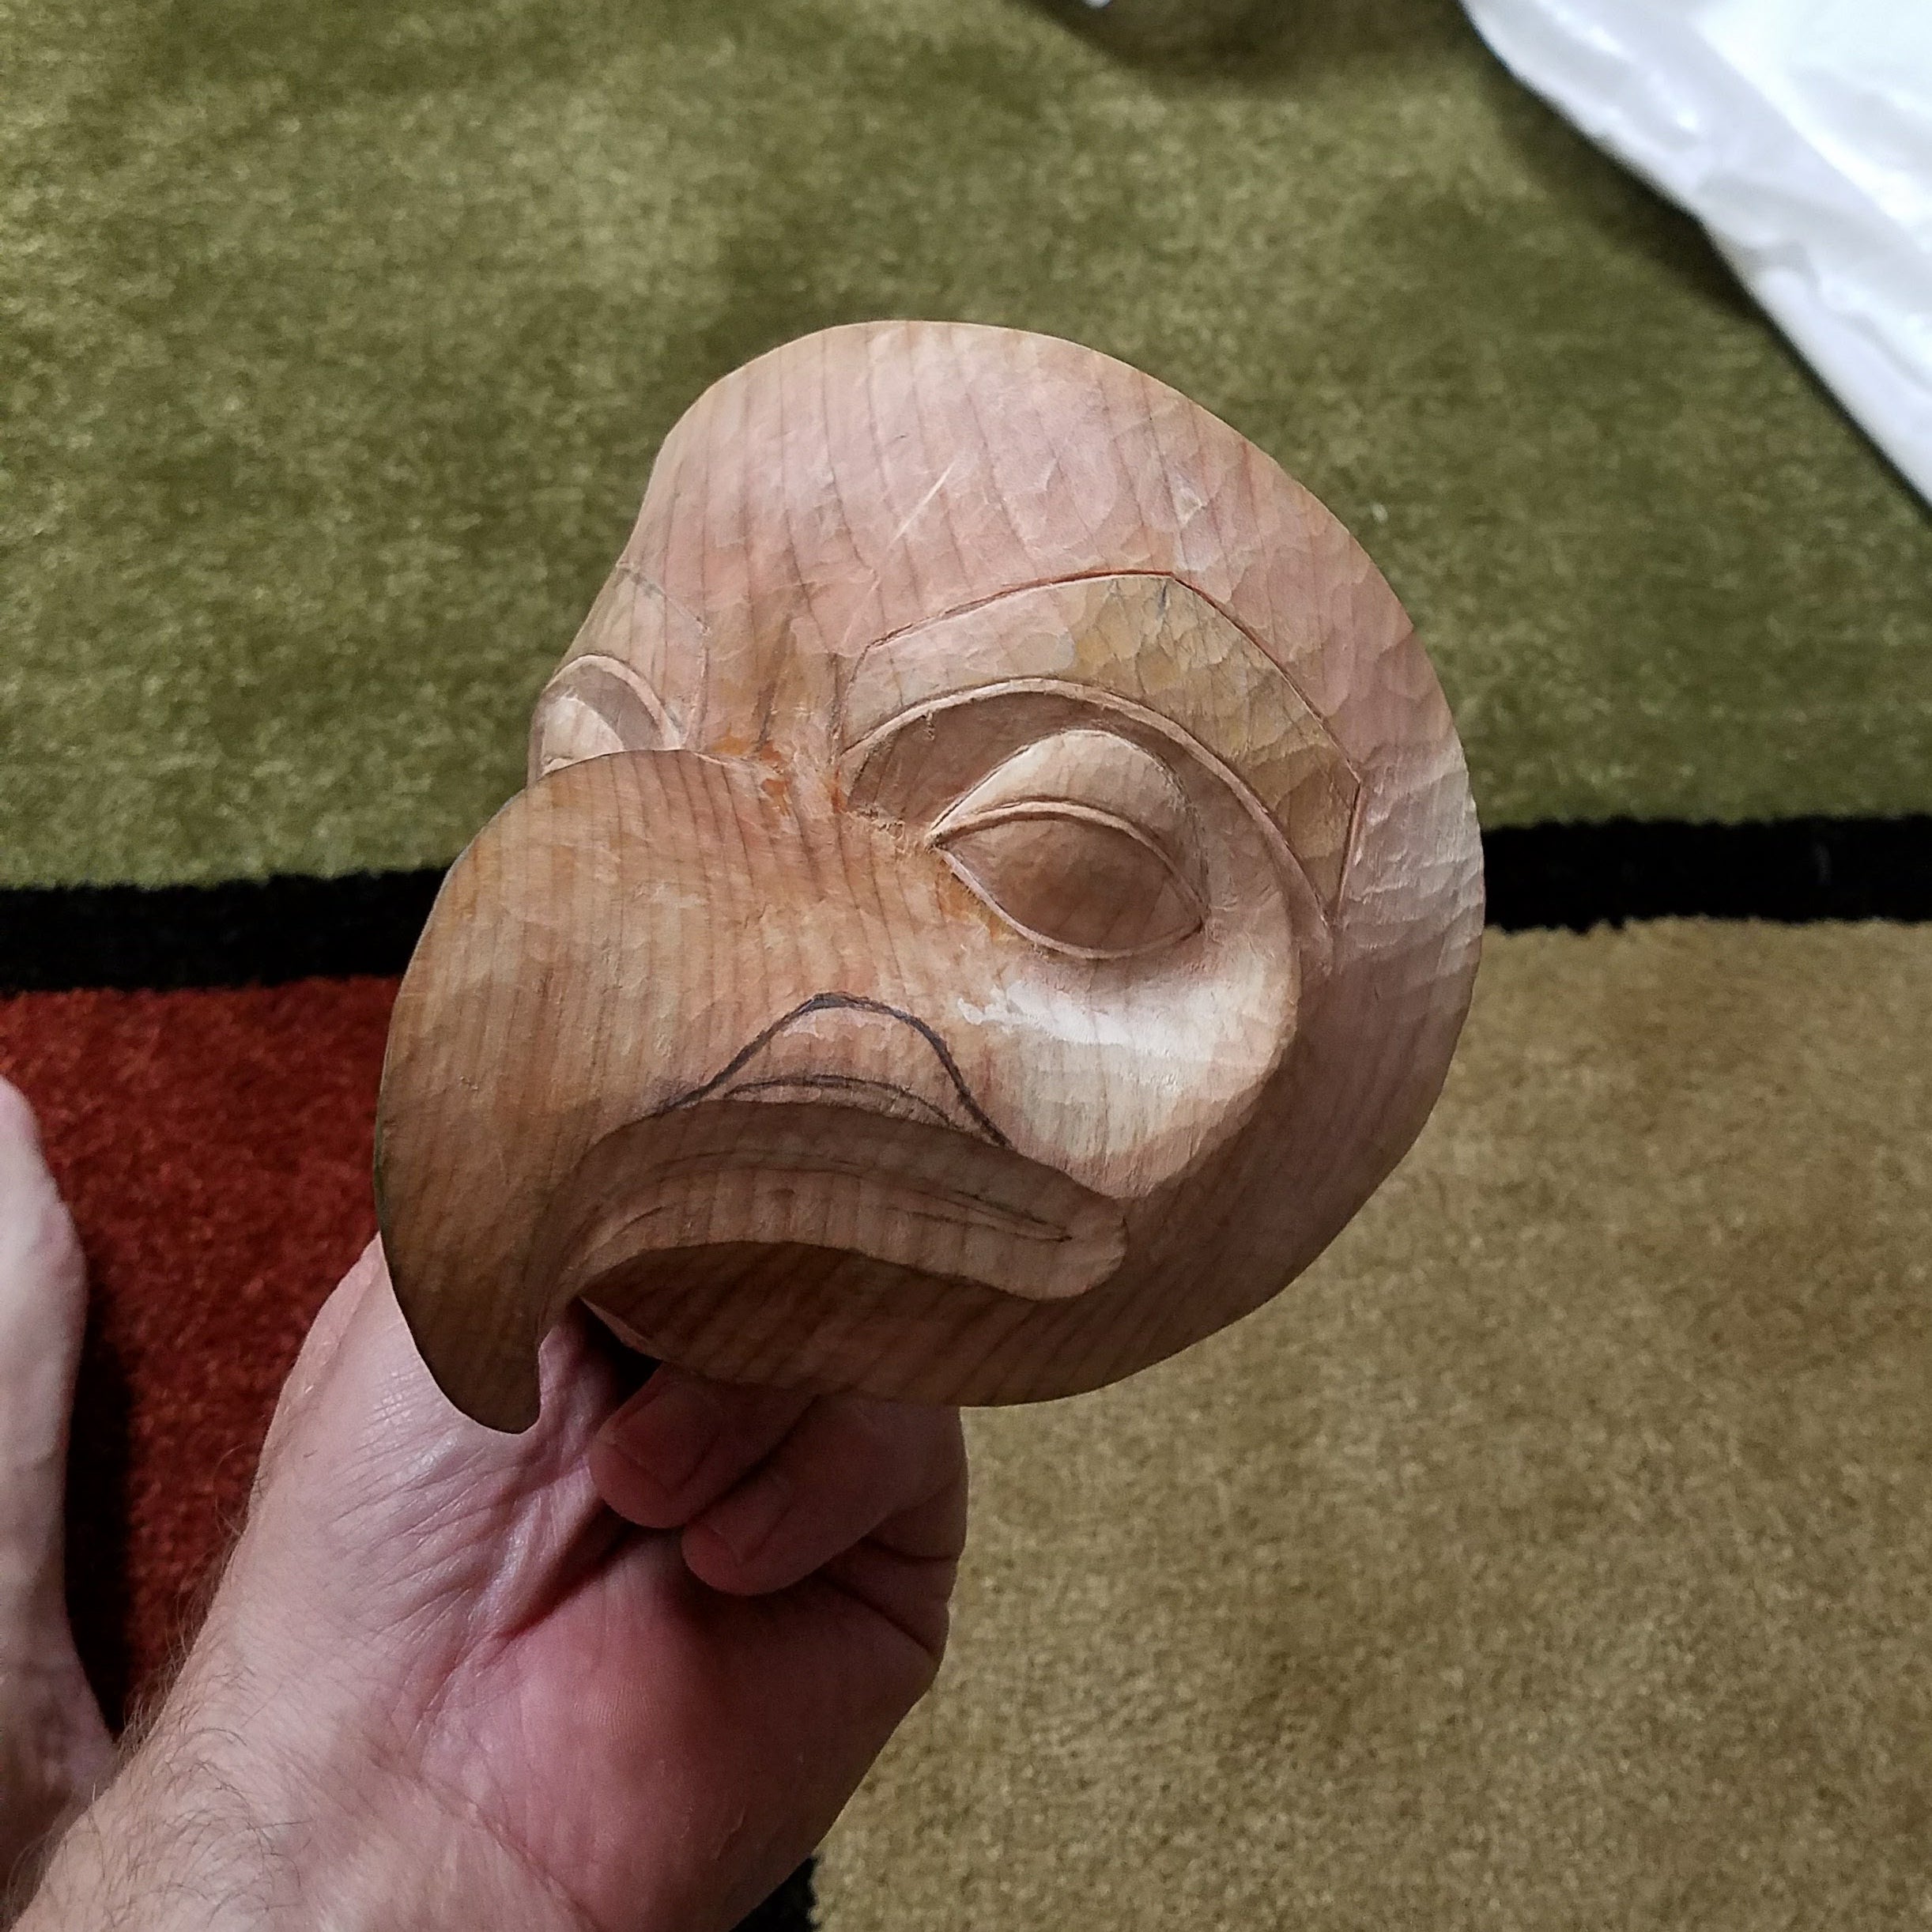
I like to take pictures and video clips when I’m working on a project. Learning how to carve from another artist is no different, so I took many pictures of the process. This is the best way to remember each step. I do this because when I learn how to carve, for example: like this Eaglet mask, I dive right into making another one on my own, this helps me to remember through repetition.
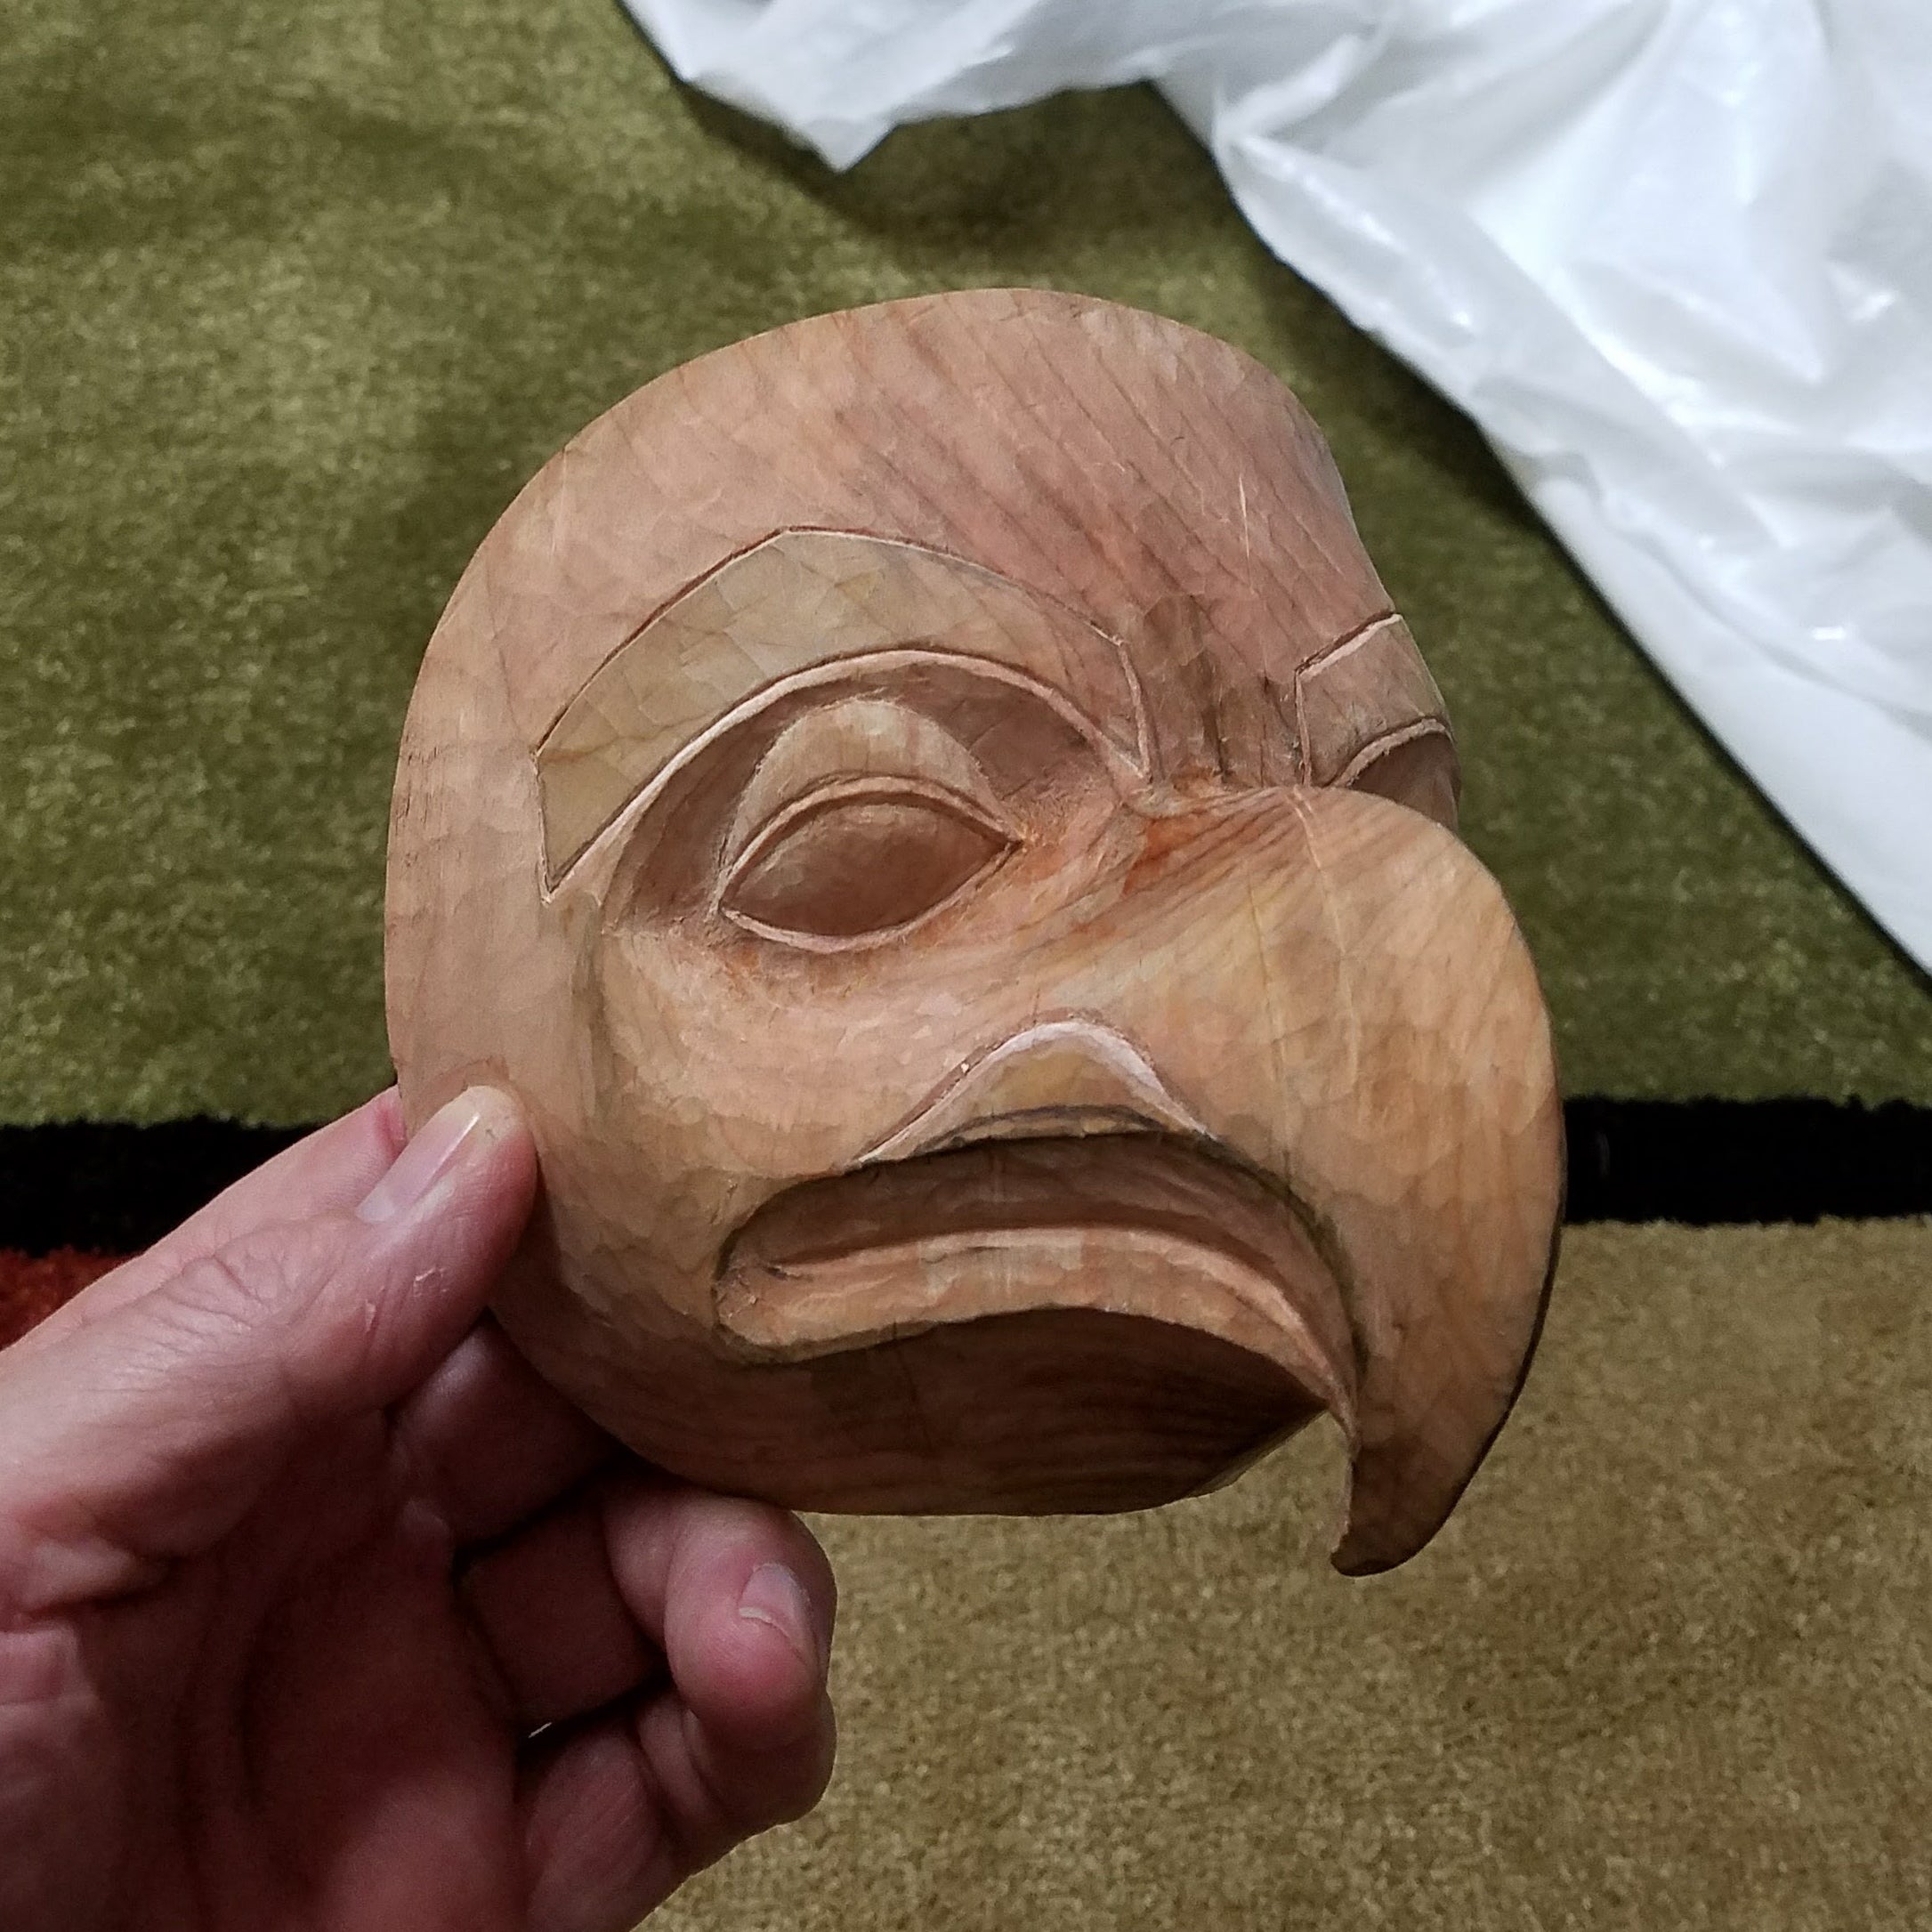
The finished Eaglet mask measured 4 inches tall x 4 inches wide x 5 inches deep. Since this was a smaller mask blank. I thought of it as an Eaglet, a young Eagle.
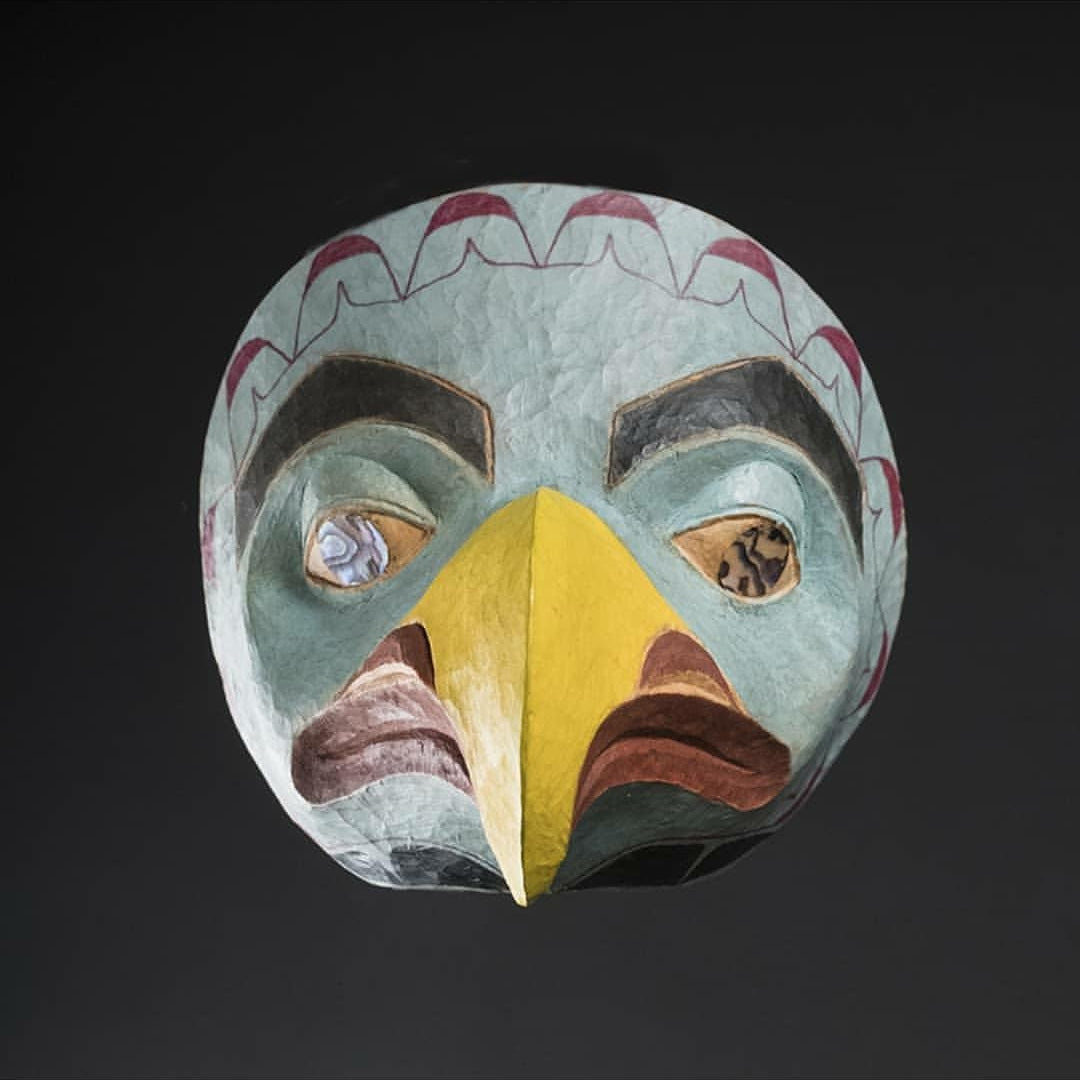
When carving the mask is complete. It’s time to design and paint!
I painted the Tlingit blue/green around most of the mask, which is a common practice. Black eyebrows, red lips, and nostrils. Yellow beak to complete most of the desired look.
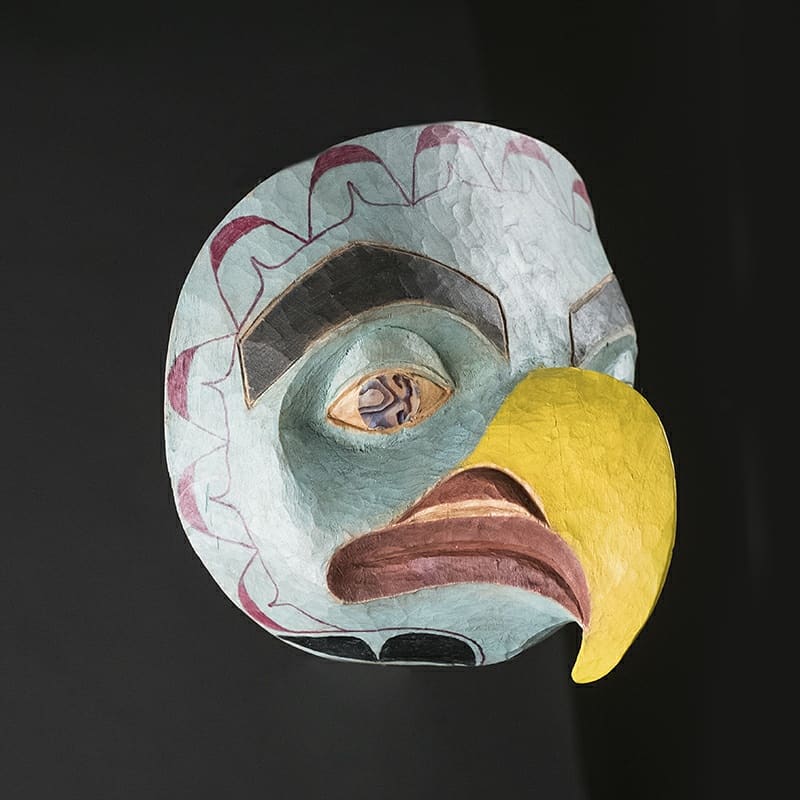
Instead of painting the pupils black, I chose to use abalone.
Is the mask done? It could be and would look pretty good as it is.
But I wanted to break up all that blue/green area. The Eaglet mask has this rounded look to it at the edges. I decided to add repeating U shapes along the outer edge. I chose to use red to help balance out the red lips and nostrils. As the form line came down below the beak, I chose a different form line pattern and painted it black, which helped balance the black eyebrows. Overall, it looks complete.
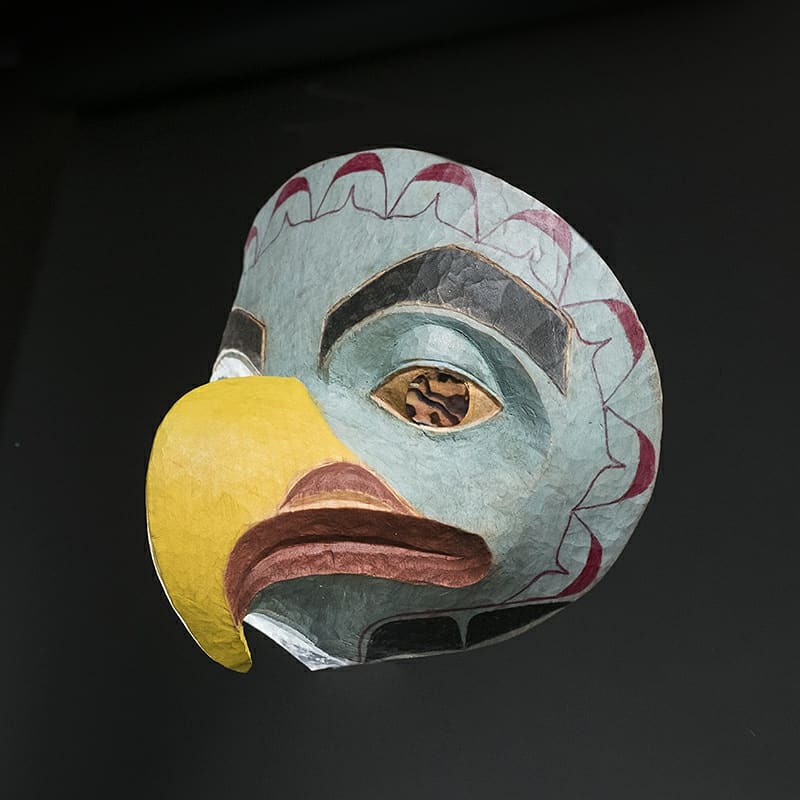
Now the Eagle mask is done!!
Remember I mentioned that I like to carve another mask when I learn a new method. I got another piece of alder from Ray, this time it was a larger piece of alder so I could carve a larger Eagle mask.
After getting the faceting done and drawing the Eagle profile It’s time to get the knives out and start shaping the Eagle. I have the completed little Eaglet mask along with pictures and video clips to refer to. Makes this process a lot easier.
I had some time off between jobs. So, I approached SHI Sealaska Heritage Institute about using the space outside the front of their building to do some demonstration carving for 6 weeks. They agreed! It was June and the cruise ship tourist season was in full swing. I was looking forward to getting as much carving in as possible, talking to tourists, answering any questions they might have, and sharing Tlingit culture. I was able to do this and had a good time being there.
The Eagle mask was coming along, the beak was taking shape, and the eyes were getting established looking more like an Eagle. I would carve on a few different pieces during the time I was at SHI. On one of the days I was carving on the Eagle mask. A friend Donald Gregory who works at SHI came outside during his break. He was watching me carve, he then made a comment that caught my attention. He said, “From where I’m standing that looks like an octopus beak”. I took a closer look at the mask, and sure enough, it looked like an octopus beak.
Eagle Mask transforms into an Octopus Mask
So right then and there, I decided it was going to be an Octopus mask. The face remained the same for the most part. What I needed to do was add tentacles. This is the place where I often say I’m finding my way. I decided to have 2 tentacles wrap up around the outside on either side of the face starting at the bottom of the mask at the C/L, and looping around in a circular fashion at the top of the mask overlapping the eyebrows.
The idea was to raise the tentacles off the face by removing wood around the tentacles which makes them pop out. The suckers on the tentacles were carved individually to define them. With the suckers being concave as well, I decided to inlay abalone to the tops of them which was an awesome finishing touch.
Now go to the other side and do the same thing. Oh no, the alder had dried on that side by now making it very difficult to carve. I had to decide, to wet it down and try carving it or come up with a different idea for that side. I decided to not carve that side but to draw the tentacle with suckers like the other side and paint it instead. I painted the suckers white.
When challenges surface during a project wood carvers sometimes need to adapt. Many times, it works out for the better.
I think what started out to be an Eagle mask, ending up an Octopus worked out well in the end!! If I say so myself.
That’s finding my way, allowing the mask to evolve during the creative process!
From my place to yours!
Have a Great day!
Fred Fulmer


1 comment
Thanks our time of conversation today. Your responses to my questions were much appreciated. Ed